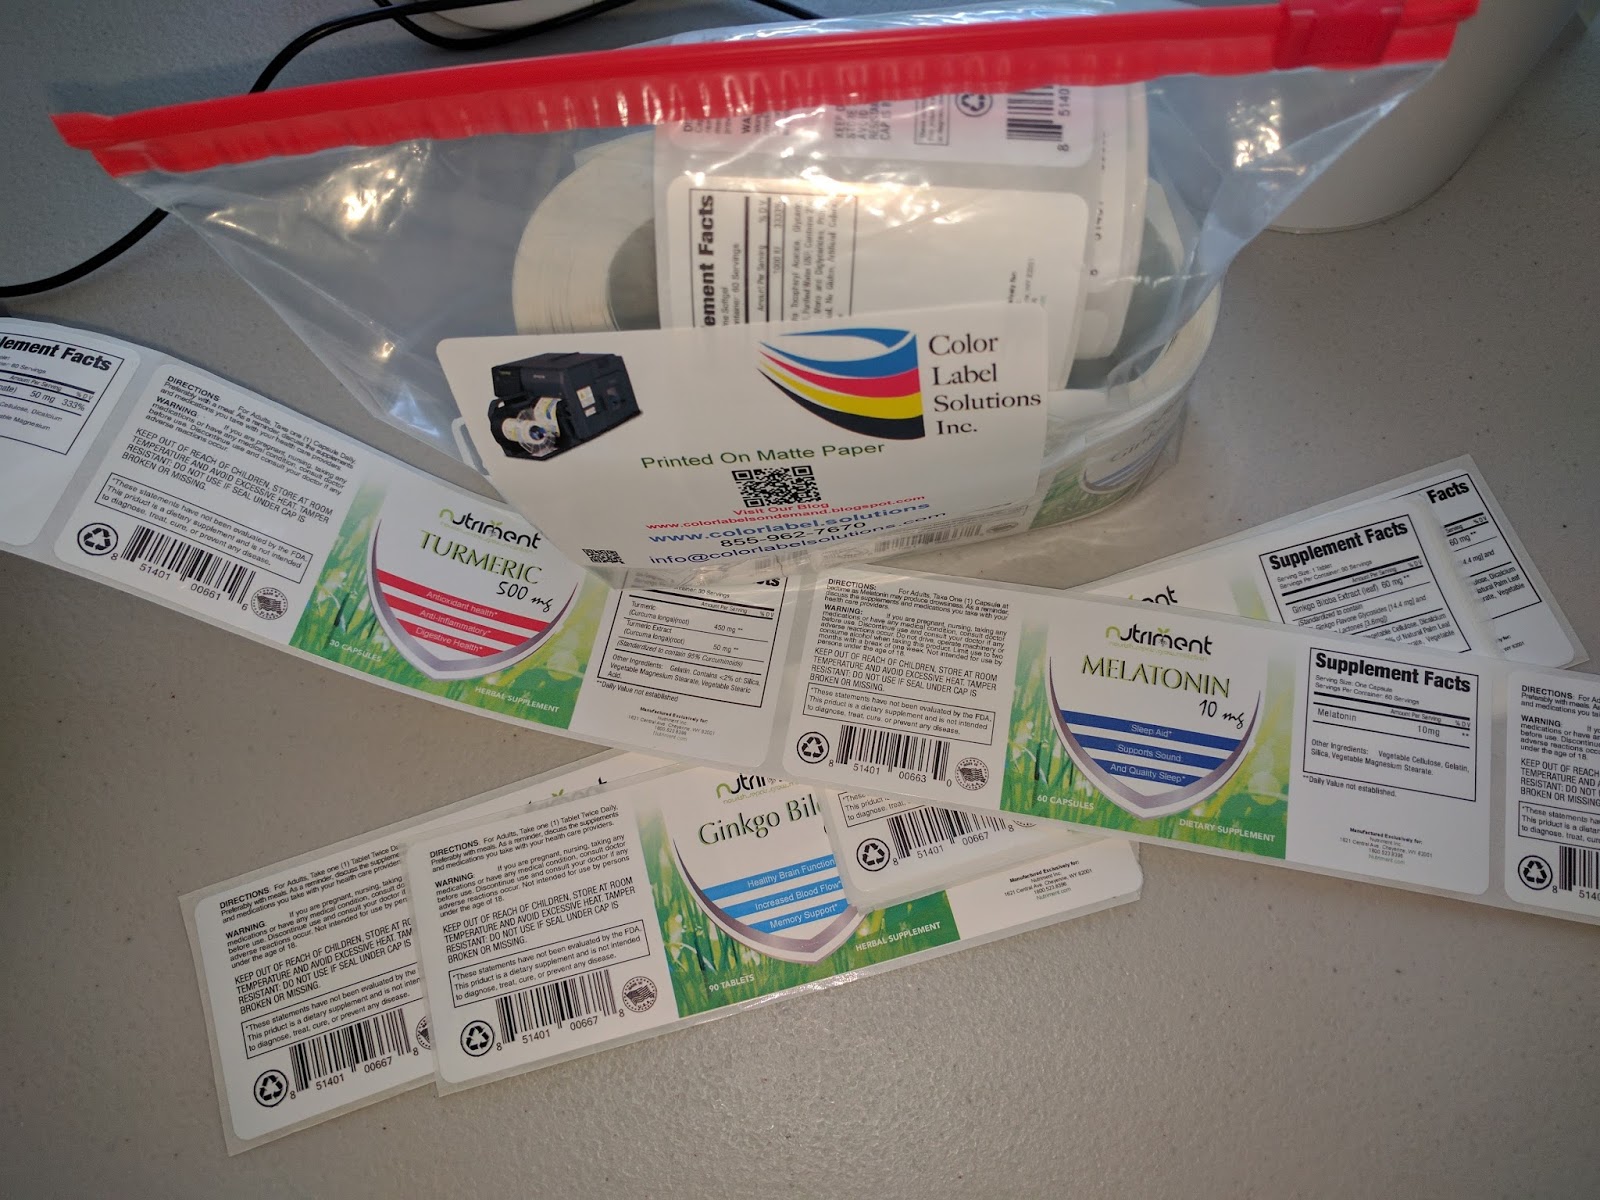
Edible Love

Love’s Oven (www.lovesoven.comproducts are produced with the highest quality all-natural ingredients that are sourced locally (Colorado beet sugar) and organically (organic coconut oil) whenever possible. Their proprietary THC & CBD extraction methods ensure that you receive a consistent and effective dose of cannabutter/cannaoil Love in every bite.


Love’s Oven was born in 2009 with a promise to its patients to provide great tasting cleanly extracted products to help with their chronic pain and other ailments.  If you look at the label of any of their 15+ products you’ll never find any ingredients that you need to have a chemical engineering degree to pronounce. Ingredients like crystallized ginger and honey roasted peanut butter are about as complicated as it gets.  Love’s Oven has built its reputation by crafting their products in a state of the art facility in Denver where their food safety and quality assurance programs guarantee you’ll receive a potent and delicious product that can be found throughout Colorado.

In the fall of 2016, Colorado issued new label requirements that caused Love’s Oven to change their labeling procedures. According to Katie Wrank, Administrative Assistant & Marketing, “Colorado mandated that we add the Universal THC Symbol, in various sizes and colors, to each label for both medical and recreation use.  At the time, we were using a black only, DataMax thermal transfer printer adding variable data on top of five different preprinted labels in conjunction to printing some on a laser printer. This process was very frustrating and time consuming.  We had to make a change.”
Katie says, “While growing significantly, we needed an efficient and improved process to label our products. Prior to any changes, our work flow was to extract label information from the daily production list, transfer the production numbers and product information manually to the packaging order, and then type everything by hand onto our label templates. With over eighty-eight label templates requiring daily changes, our label process was at risk for human error. Plus, all these changes were too much for one person to manage.” 
To change their label process, Love’s Oven contacted Rich Arbogast of Sendata Systems, (www.sendatasystems.com). As a partner of Color Label Solutions, Rich contacted us to see if we have a solution for Love’s Oven.  Rich said, “Sendata are experts at managing data and thermal transfer printers.  But decided to work with Color Label Solutions to bring the best possible print on-demand color label system for our customer, Love’s Oven.
To start the process, we printed sample labels on the C7500G.  We recommended this printer given their need for a large volume of gloss labels.

Love's Oven C7500G Full-Bleed Label
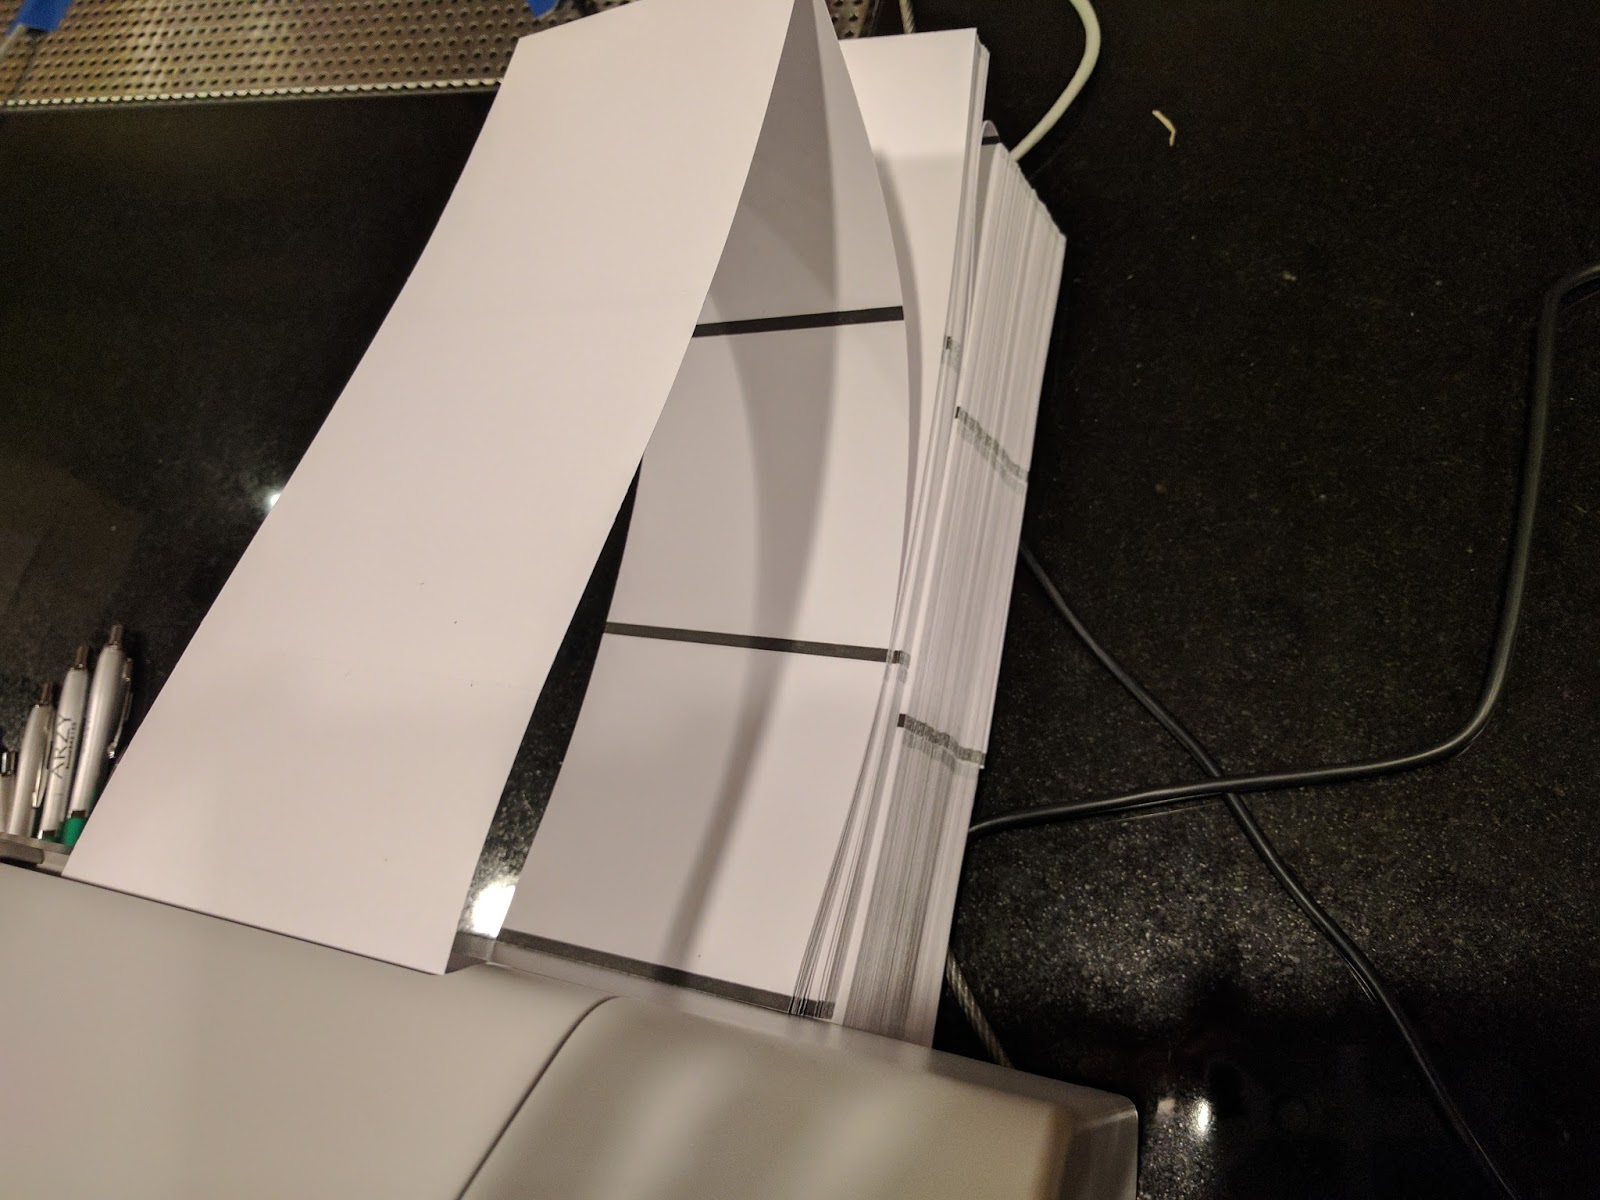
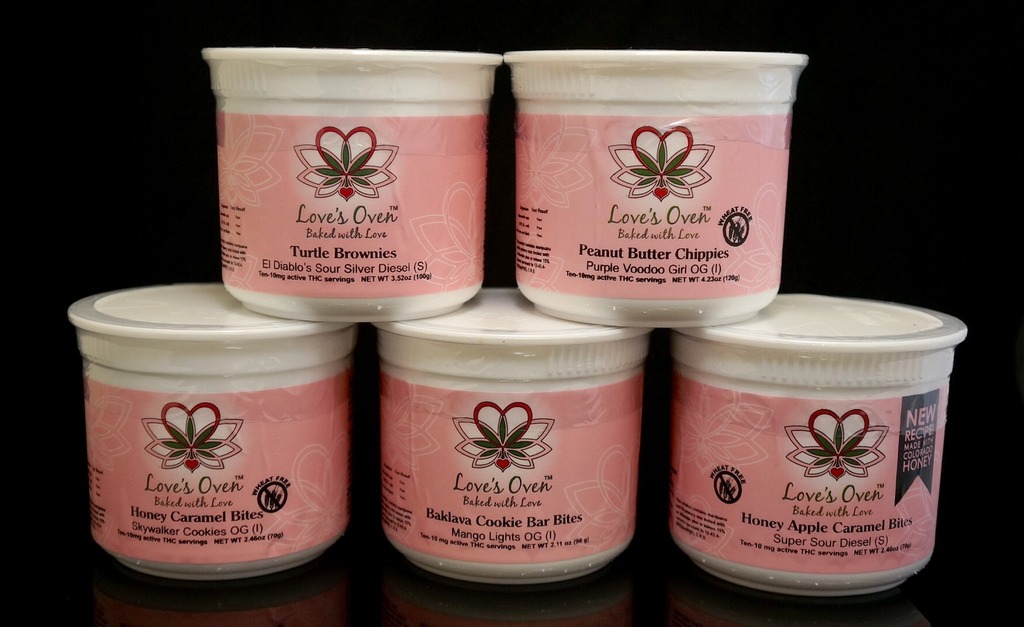
Love’s Oven C7500G Full-Bleed Label
In addition, we provided an estimated ink cost of their labels.

C7500G Estimated Ink Yield
On these long, full-bleed labels, I estimated the ink cost at $0.027 per label.  Based on the samples and estimated ink costs, Love’s Oven purchased a C7500G printer.
About the C7500G, Katie says, “We now have the ability to print on demand labels quickly and efficiently. We also have the design flexibility to change our graphics on a moment’s notice.  Many of our customers love to see their logo printed in full color on products that contain their trim or flower.”
While working with Love’s Oven, I learned about their new label creation process.  Katie says, “to improve our labeling process, I decided to use a mail merge technic that I used in a former position at a large shipping and printing company. In Excel, I created a database of our products, including all the variable information: product name, ingredients, allergens, net weight, and pieces per package. This database allows us to quickly update product information such as changes to a recipe. On another tab in the Excel database, we retain information about the ingredients used during the cultivation of the marijuana, which are required by the state of Colorado. By using the VLOOKUP command in Excel, we pull information pertaining to each product, automating the data input on the production list.”
“Once we have the products compiled in one list, we use Adobe InDesign to merge the data with our artwork onto the backgrounds of our label templates. With this workflow, we can export all our labels from one file as separate PDF files which print like a dream on the C7500G.”
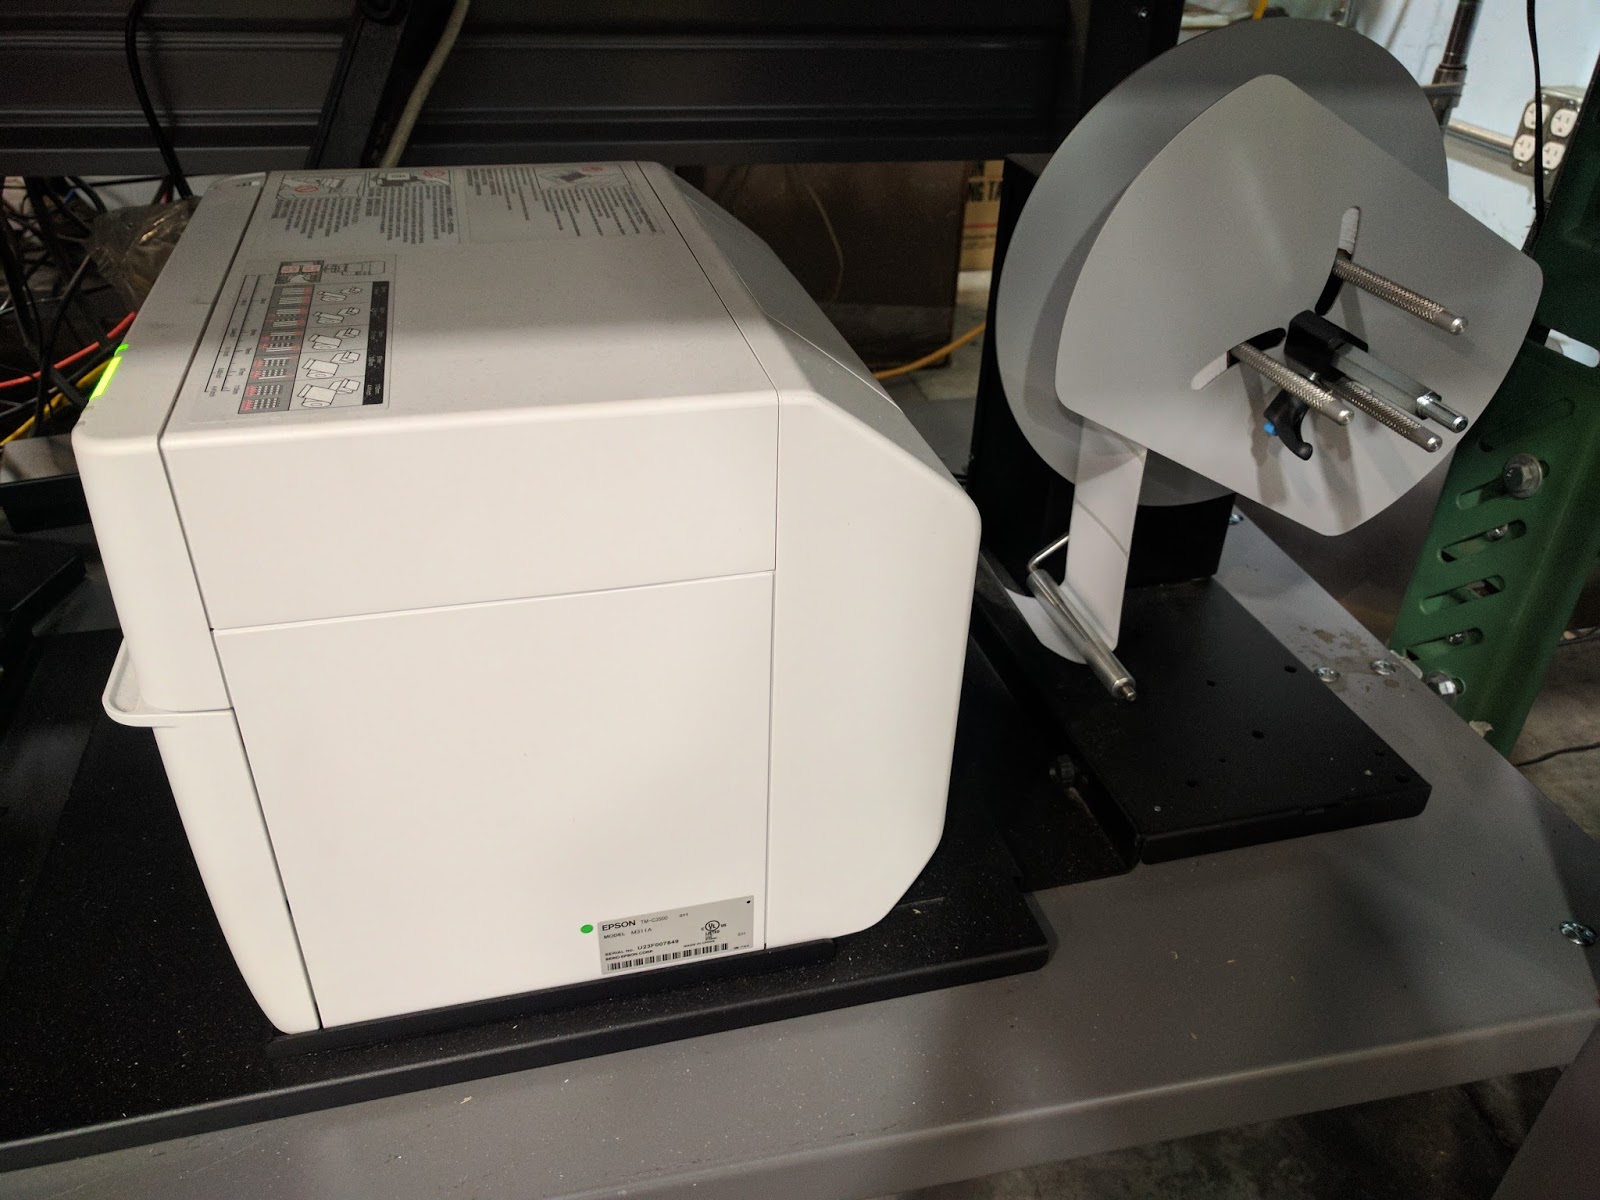
C7500G Label
C7500G Label
One other interesting note, Rich has worked to help Love’s Oven to print THC symbols on their brownies using white, food-grade ink.  What a great solution Rich put together for Love’s Oven.

Edible Ink Printed Brownies
“With the constantly changing Cannabis labeling/direct marketing laws and regulations required by the State of Colorado, providing the best solution to these requirements was our goal. I believe we hit the mark with the C7500G printer for the packaging labels and direct marking food grade inkjet coder for applying the mark directly to the edible products. These products are the only ones I know that can print with the quality needed for the labels, and the food grade ink for the direct marking of the edible food cannabis products.”
We’re excited by the success at Love’s Oven.  If you need a new labeling solution for your cannabis or any other products, contact Color Label Solutions.  We’ll help you meet the regulatory requirements of your industry; and produce beautiful labels in the process.

Guy Mikel
855-962-7670

On-Demand Color Mattress Tags-Labels

The story of Pleasant Mattress Inc. stretches back to the throes of World War II, when the original Morgensterns immigrated from Vienna to the United States and cobbled together a new life. Today, Pleasant Mattress continues their tradition of resourcefulness and forward-thinking. Their success rests on the synergy between father and son. Generation after generation, Morgenstern sons have taken inspiration from their fathers, each one building on the tradition of the last. As Isaac Newton said, the secret to success is standing on the shoulders of giants.


Pleasant Mattress manufactures following product lines in their plant in Fresno, California:

   Chattam & Wells-the first Californian Born luxury mattress.  Each Chattam & Wells luxury mattress is made in the USA by people who believe their job is to create a mattress that provides the foundation for a healthy life.
   MAXX-Ingeniously over-engineered for years of support.  MAXX takes cues from traditional high-end mattress crafting; employing proven and durable coil engineering.  
   Spring Air- the standard for quality mattressesand sleep systems. A great night’s sleep starts with a mattress that can both support the body and relieve pressure where it is needed most. Spring Air Back Supporter mattresses do just that, with patented designs and innovations that are unmatched by any other bedding company.
   Eclipse-makes a difference in the sleep health of their customers through handcrafting the highest quality sleep products.  
Pleasant Mattress Factory
Pleasant Mattress contacted me when they wanted to add color labels and tags into their operation.  According to Russell Raymond, Director of Plant Operations, “In our facility, we mark each law tag we sew into our mattresses with a highlighter.  Each day of the week is added to each tag in the color of the group of orders.  These colors markers make it easy to track our products through production.  But it takes time to mark all of these tags; and opens up the possibility of errors.  We needed to automate this process, using our existing Easy Label software.”
To test the feasibility of this solution, I shipped a C3500 demo printer and labels to Pleasant Mattress to test.  Working with IT, we added the demo printer to their network and adjusted the Easy Label templates to add color based on the order number.  We made this change in a very short time.

Pleasant Mattress Text Label
Pleasant Mattress Test Label


In addition, we tested sewing into the mattresses some of the 5 mil poly tags we sell, and they seemed to work great.
 

Tag Sample Sewn Into Fabric

Based on this test, Pleasant Mattress purchased C3500, tags and labels; and deployed them in their operation.

C3500 Printing 4
C3500 Printing 4″ x 12″ Tags
These printers produce the 4” x 12” law tags.  The letter represents the day of the week of the production; and the color represents a group of orders.

On-Demand Color Mattress Law Tag
And these tags are sewed into the mattress during production:

Color Tag Sewn Into Mattress
Once packaged, Easy Label generates a color-coded label for each mattress to represent a shipment of a group of orders.

On Demand Color  Mattress Label
On Demand Color  Mattress Label
And once the label is on the finished product, Pleasant Mattress uses the color-coded label for staging and loading of orders.

On-Demand Color Labels for Staging
According to Russell, “the color codes prevent potential errors.  If a shipping error is made, the incorrect color sticks out.  The color-coding labels in our operation saves us time and potential costs.”
The color-coding solution deployed at Pleasant Mattress reminds me of one of the first stories I completed on the C3500, many years ago at Tubelite:


From my perspective, two aspects of the Pleasant Mattress C3500 deployment make this solution stand out. Neither have anything to do with the printer.
First, Pleasant Mattress understood how color would improve their operation, and they found a way to automate this component as part of the solution.
Second, implementing an automated color printing solution was easy.  Using their existing label printing software, Easy Label, Pleasant Mattress’s IT manager understood the application sufficiently that making the change was easy.
I’m exciting by the on-demand tag and label solution implemented by Pleasant Mattress, as it shows how color creates value in an operation.  Contact us to discuss how color can improve your operation as well.
Guy Mikel
855-962-7670

No Risk Label Printing

This post is from guest blogger, Tim Semic, Support Manager from Color Label Solutions.

Would you like to provide a way for your employees or vendors to print labels that meet your exact specifications without the risk of accidentally making changes? 
How about printing labels from multiple computers? 

Printing labels from a web browser?  Even across the internet?

BarTender Print Portal
 If so then please read on…
Seagull Scientific offers two Bartender companion applications that enable you to print labels from a simple read-only interface.  Those applications are Bartender Print Shop, and Bartender Print Portal.
The user interface is basically the same between the two products, while the configuration is more complex for Print Portal.
Bartender Print Station is bundled with every edition of Bartender, while Bartender Print Portal is only bundled with the Enterprise-Automation edition.
Print Station provides a mechanism for printing labels within an easy to use read-only interface.  This configuration prevents employees accidentally changing or deleting labels.  Consequently, some companies may wish to have a “design” computer using Bartender Designer, and then another computer or two set up for print-only label printing.

BarTender Print Station
Print Station can be configured for full-screen and secured; effectively turning a computer into a print kiosk.  This type of kiosk would be great for printing badges, shipping labels, or static labels in a secured computer interface.

To learn how to configure Print Station, watch this video:

Configuring BarTender Print Station 

Print Portal offers different options for risk free label printing.  Elizabeth Sinclair of Seagull Scientific says, “Print Portal includes many features that make locating and printing documents quick and easy. Running on a web server, BarTender documents are available from any computer connected to the internet. With built-in security measures, administrators of Print Portal can require users to login to the site, and assign user permissions granting access to specific documents on the server. Print Portal’s intuitive interface lets users quickly locate the document they need to print and send it to the printer with a simple “click” operation.”

BarTender Print Portal
If interested in learning how to configure Print Portal, see this YouTube video. 


As Print Portal is more difficult to configure, the video is long; but goes through every step in the process to get your users, either internal employees or outside vendors, printing the labels you need.
To operate Print Portal, you’ll need an Enterprise Automation edition of Bartender; which is licensed based on the number of label printers you require.
Which edition is right for me?
The number of computers required to print labels will dictate which companion application to use.  If you wish to provide label printing in a read-only interface from more than three computers, purchase the Enterprise Automation edition of Bartender.  You will get security, ease of label printing, and some pretty heavy bragging rights too!
And contact us to help you configure Print Portal to work for you and your company.  Happy Printing!
Tim Semic
855-962-7670

“GE”–NOT “G”

As of August 1st 2017, Epson will no longer sell the C7500G printer.  They announced end-of-life for this part number earlier this July.


C7500G
C7500G

I first wrote about the C7500G in July of 2015:


And wrote about one of our first customers, NIC Industries, using the C7500G:


Instead of the C7500G, Epson will sell the C7500GE.  The “GE” is a printer bundle: including the C7500G printer, a single user license of Wasatch SoftRIP, one year of on-site service for the printer, and 6 months of free support for Wasatch SoftRIP.  Learn more about the GE printer bundle, including the Wasatch RIP here:


With the SoftRIP, you get better color control; especially important when trying to color match.  For example, you may use it to match specified Pantone numbers, to match more closely the color printed on a label to the original artwork.  However, you don’t have to use the SoftRIP to print to the C7500G.  You can print to the C7500G from most if not all Windows based applications.

Wasatch SoftRip Label Edition
Here is information from Wasatch on their Label Edition: 


For an incremental $955 for the C7500GE versus the C7500G, you get 1 year of on-site service valued at $1,029 and the Wasatch SoftRIP valued at $1,200.   Even with just the on-site service, the GE bundle is a great deal.
Personally, I believe the SoftRIP is best suited for professional printers; those individuals experience with using other RASTER IMAGE PROCESSORS (RIP) from other printing applications.  Although not difficult, using the RIP is different than printing directly from a PDF and other Window-based software programs.
So beginning August 1st, you’ll be able to purchase only the “GE” version.  But some of you may not want or need the on-site service or the RIP software.  If so, please contact us know to order your C7500G before the price goes up.  Or purchase from our store here:


Don’t forget to add 2 years of Extended Warranty with the “G”:


And a spare set of ink:


And a spare maintenance kit:


If you prefer to get the C7500GE with the one year on-site service and Wasatch SoftRip, purchase in our store here: 


Or contact us if you have any questions around printing color labels on-demand.
Guy Mikel
949-680-7840

Induction Sealing Statistics – How You Must Get The Right Cap and Lining Material Combinations

This discussion below is an excerpt of a client discussion we have prior to supplying equipment. We don’t have to do this; we could be like the ebay or Alibaba or “one stop every machine under the sun supplier” but we are not as we like to think of ourselves as a supplier invited to […]

L801 Full-Bleed Label Printing

While attending the recent Afinia reseller meeting, I learned about a relatively new feature built into the L801 printer driver, which makes full-bleed printing relatively easy.  Let me tell you more.


L801 Full-Bleed Printed Label
If this company is new to you, Afinia Label (www.afinialabel.com) was founded in 2009 to offer specialty printing solutions with best-in-class support at accessible prices. Their parent company, Microboards Technology, has been offering media duplication products since 1989. This background gives Afinia a rock-solid foundation of technical expertise, and decades of experience providing the best possible customer service.  
In the past, I’ve written about one of their new products, the L301:  

and we’ve sold some of their other products.  Afinia’s major product is the L801 which uses the Memjet print engine:

The L801 prints beautiful labels up to 8.5” wide; especially using the dye-based inks.  Although the dye inks are not sufficiently durable for many applications, they produce a very vibrant color, which is required for many prime label applications where many customers want to print full-bleed.
But full-bleed printing can be difficult on die-cut labels.  You must get some ink on the exposed liner; but not too much.  Too much ink on the liner may transfer to the label itself.  I written about full-bleed label printing in the past.  Here is a recent post covering full-bleed printing.


Now in the driver, Afinia has added to their driver controls that make it easy to print full-bleed labels.  To cover labels 100% with ink, you need to first know the orientation of the labels. To know the “language” that Afinia uses to describe the label orientation.

L801 Label Orientation
The leading edge of the label (the edge that comes out of the printer first) is described as the “Top”; making the trailing edge of the label the “Bottom”.  Standing behind the printer, you’ll find the “Left” and the “Right” edges.  When facing the printer, the left and right are reversed (naturally).
When printing full-bleed, Afinia recommends making the size of the label in the driver slightly larger than the actual label size.  I’ve used 0.03” as my standard recommendation since I’ve written this article on the LX2000:


Once the print size is set in the driver, Afinia recommends printing a few labels to examine the initial print output.  You need to ignore the first label, according to Afinia, to enable the settings to be completely implemented.
Once printing, you can see if the image need to move up or down; or right to left to better fit.  To move the image in the template, it’s simple to do using the position adjustment.

L801 Position Adjustment
The position adjustment provides the movement direction for positive or negative inches or millimeters you can adjust the image. This diagram makes it very simple to center the image correctly on the label.  Again the idea is to have only a very thin line of ink on the liner; covering the edge of the label completely.  Here is the setting we used during our training:

L801 Position Adjustment
Once this setting is establish, Afinia recommends printing a few more labels.
If you still have an edge or two that is still slightly off, you can make an “offset” adjustment on a single edge.  This setting basically stretches the edge slightly; just enough to eliminate a thin ribbon of white label showing; or to reduce the overprint slightly.  Again, here is my setting during training:

L801 Offset Adjustment
It’s a genus idea that makes printing full-bleed easier to do.


According to Mike Atkins, National Sales Manager for Afinia, “The low cost of ink and great quality of color output from the L801 has made it one of our most popular options for prime label applications. However, printing edge-to-edge has certainly presented a challenge to users in the past. These latest updates in the driver have opened up what our customers can do with the L801, and the response has been overwhelmingly positive.”
If you need to print full-bleed labels; but don’t want to spend a lot of time adjusting the print, contact us to help you with the L801 color label printer from Afinia.
Guy Mikel
855-962-7670

On-Demand Color Badges

Founded in 1976, CompuSystems (https://www.compusystems.com/has enjoyed many years as a major registration service provider for the trade show industry. They offer integrated software that meets the specific needs of their clients, creating an ecosystem that fosters the buyer and seller relationship.

Their goal is to establish long lasting relationships with their clients based on trust, a shared success and a commitment to quality. Their vision is to have every customer recommend CompuSystems. To succeed, CompuSystems is dedicated to making investments in quality products and services to support their customers now and in the future.


When Jeremy Kubik, Director of IT for CompuSystems, and I first communicated, he was looking for an alternative to the Xerox Color printers they were using.  Jeremy said, “We’re looking for an alternative to the Xerox sheet fed printer.  We want to use some type of continuous badges; many of our badges are 4” x 12”.  In addition, we need a smaller footprint as our registration desks have limited space.  Plus we need to have the capability to print on-demand and in color.”
Based on our discussion, I sent samples of both 10 mil paper and 8 mil poly badges designed to work in the C3500.  The poly material is more expensive than the paper; but prints great and is very durable.  Ink costs are less, generally, compared to laser..  On the sample artwork provided by Jeremy, I estimated the ink cost for the C3500 printer at $0.049/badge.  Not bad for a 12” tag.

4
4″ x 12″ Badge Ink Cost-C3500
As CompuSystems consider alternatives, I found a new 8 pt tag paper tag material that was stiffer and printed great.  Plus this material was very affordable.  With this new material, Jeremy created a new 12” tag design, set up to print 2, 4” x 6” badges separated by a crease.  With this design, the C3500 can print a two-sided badge.

4
4″ x 12″ Badge Design
Based on the available materials, running costs and printer cost, CompuSystems purchased C3500 printers for their badge printing.

C3500 Badge Printers
Even more interesting to me, is how CompuSystems deployed the printers in an overall solution.  First, how the printers were deployed.  According to Jeremy, “to install and configure the printer drivers, I figured out how to accomplish this task via a batch mode.  This step was important as every badge pickup desk at each event uses a different server.  The batch driver deployment makes it easy for us to set up an event.”

C3500 Badge Printers
In addition, CompuSystems uses BarTender to create the templates and print badges.  According to Jeremy, “we use BarTender to print our badges.  Our Unix-based registration application looks up each person in the database and “prints” via port 9100 to the local BarTender server.  BarTender then adds the variable information to the template to create each individual badge.  We’re printing hundreds or even thousands of badges at a time with variable information.   All that information is then synchronized with our main servers.  BarTender works great for us.”

BarTender Badge Printing
C3500 Badge
C3500 Badge

Jeremy and CompuSystems has built a great solution for printing color badges on demand using the C3500 printers and BarTender.  Jeremy says “we’re very happy with the performance of the C3500 in our first event.  They’re working great; printing very fast.  We especially like the short time to first print.  Plus the print quality is sufficient for our situation.”
In addition, we’ve found badge material, both paper and poly that print great and is affordable.

Fanfold Badge Tags
If you need to print event badges, contact us.  We’ll help you move to printing color badges on-demand, saving you time and money.
Guy Mikel
855-962-7670

Perfect Print On-Demand Color Label Example

Founded in 1987 as a local wholesaler of products for the cabinet and furniture trades, QuickScrews International Corporation (www.quickscrews.com) has evolved into the supplier of the most popular brand of fasteners in the industry; including their new solar division (https://solarroofhook.com/).   Their highly trained and experienced personnel are ready to discuss their customer’s needs to deliver on the promise “Get the Screws You Need Faster Than Ever”. QuickScrews uses technology to service many different categories of customers; from weekend warriors looking to finish a project, large cabinetmakers or solar roof installers, or wholesalers looking to support their customers. In 2010, QuickScrews began selling their products online, which expanded their customer base to more than 10,000 customers and shipping orders within 24 hours of receipt.


From my perspective, QuickScrews is the perfect example of a company needing to print color labels on demand.  With thousands of SKU’s, QuickScrews uses colors and icons to differentiate types of fasteners. With their solar products, here are their color codes:

QuickScrews Color Codes
And here are icons in use on one of their products:

QuickScrews Variable Icons
Quickscrews prints these labels using the C3500 in stations distributed in their plants in Livermore, CA and in South Carolina.


And they have experimented using a very inexpensive Go-Dex unwinder to feed large rolls of labels into the C3500.  And it works seemingly great!

C3500 with Inexpensive GoDex Unwinder
But the real magic of the QuickScrews print on-demand color label solution is their database of products and their deployment of BarTender.  According to Mark Buechler, Senior IT Manager for QuickScrews, “our Marketing department has spent a lot of time gathering information and taking pictures of many different fasteners for our database.  We’ve worked hard not only setting up the structure of our database in Excel, but also adding the descriptors, color codes, and variable images associated with every single SKU we sell. It’s a process that will never end”.
In addition to the database, Mark has deployed BarTender, designing different label templates and setting up the network to pull the variable data, including the different text descriptors, icons and color codes to create the labels.  According to Mark, “now each print station in either CA or SC accesses BarTender to print the labels required for each product.   This solution makes it easy for our operators to label our products correctly.  And the colors and icons make it easy for our wholesalers and customer to select the correct fastener.”
According to Elizabeth Sinclair, Manager, Verticals Marketing at Seagull Scientific, the creator of Bartender, “by using good data management practices in your labeling deployment as demonstrated by Mark and the Quickscrews team, you can create enterprise-wide efficiencies that save time, resources and money. Many companies use only the design component, and thus store data in label files. By integrating BarTender with a trusted data source, any changes are easy to make in one location rather than finding, opening, updating and saving every individual label.  QuickScrews has deployed BarTender very effectively.”
Quickscrews has developed a great business model; becoming the subject matter expert in a relatively narrow field.  This focus makes it easy for prospects and customers to purchase the correct fasteners.  By adding a great print on-demand color solution, QuickScrews can now produce labels that make their products easy to use; both their channel and end users.
If you have a large number of SKU’s and considering print on-demand color labels, contact us.  We’d love to help you build a great solution like QuickScrews.
Guy Mikel
855-962-7670

Easy To Do

Label printing can be difficult; I know.  But label printing can be easy if done correctly.  When the artwork matches the label size correctly, label printing is easy to do.

Nutriment.com (www.nutriment.combelieves that success in the nutrition business is predicated upon knowing what customers need to help optimize nutrient intake; and to help address specific health problems.  Nutriment.com has the distinction of offering formulations with the most comprehensive ingredients lists—highly potent formulations with nutrients chosen to work together so that the final effect is greater than the sum of its parts.
Joint health, male enhancement, vitamin/mineral blends and sleep aid formulations are just a few of the products they offer, and their list continues to grow. All ingredients chosen for these specific formulations are only the purist, highest in potency and scientifically validated by clinical research.  Nutriment.com uses only GMP (Good Manufacturing Practice) certified facilities to produce its formulations. This requirement assures a safe and pure product that you can take with confidence.
When first contacting Peter Baker, Owner of Nutriment, I learned he needed a printer for producing short runs of labels for new products.  “We launch new test products all the time,” said Peter.  Continuing, “Some of these new products generate demand; some don’t.  Once I have a large demand, we’ll purchase preprinted labels.  Until we have a winning product, we don’t want to purchase a large supply of labels that may never be use.”

Given that Nutriment needed to produce a limited run of labels at a time, I offered to send samples from both the C3500 and C7500G printers.  The C3500 is a very affordable label printer; the C7500G has much higher print resolution.  We discussed also the L301 (http://colorlabelsondemand.blogspot.com/2017/02/l301.html)  and the LX2000 (http://colorlabelsondemand.blogspot.com/2015/06/lx2000-full-bleed-color-label-printer.html) as well.  But the ink costs would be higher to produce labels for these printers. For the Nutriment application, the C7500G was the best choice.

To produce these samples, Peter sent me artwork setup perfectly to work with a 2” x 6” label. 

Nutrient Label PDF
Nutrient Label PDF
Notice how the label is designed with the marks setting out the location for the corners of a 2” x 6” label.  When printing these labels at the “Actual” size using Adobe Reader or Acrobat, the preview shows exactly how the label will look.

PDF Label Preview
PDF Label Preview
For the most part, we don’t carry  inventory of labels required to print all the possible sizes and types customers would want.  But in this case, I checked with our plant, who happened to have a roll of 2” x 6” and 2.5” x 6” gloss poly labels in inventory.  So I agreed to print some test labels for Nutriment.
Once I received the labels from the plant, I printed 7 different labels.  On the first label, I found that I had to move the print slightly down and change the boarder setting to .06” to get the label to print exactly as required.

Label Horizontal Adjustment Example
We then packaged up the test prints and sent to Peter.

Nutriment Label Prints
With the correct artwork and label sizes, printing great looking labels is easy to do.  Perfect for an application such as desired by Nutriment, printing labels as need for their prototype products.  Companies launching new products all the time like Nutriment, printing on-demand color labels make good economic sense.
If you want to produce great looking labels easily yourself, contact us.  We’ll help you get started printing labels quickly and easily.
Guy Mikel
855-962-7670

BenchMax

BenchMax Label Applicator (https://greatengineering.com/benchmax/)  will enable you to use any label (or 2) on any round container larger than 8 mm in diameter.  With the Small Container Adaptor, the BenchMax makes it possible to label containers down to 8 mm in diameter.  And the Orientation capability scans the container for a feature, to insure labels are applied in the correct orientation.  Finally, you can adjust the rollers to apply labels to round containers with ridges or other features.

BenchMax Label Applicator


More important to me, however, was the fact that you can now integrate the BenchMax into the C3500 and C7500 for on-demand color label printing and application.  This capability makes the BenchMax the only off-the-shelf label applicator available for integration with a color label printer.  I first wrote about this capability after WestPack 2017: http://colorlabelsondemand.blogspot.com/2017/02/westpack-2017.html

When I received my BenchMax, I was pleasantly surprised how well the unit was packed for it’s shipment from Australia to the US.


After unpacking the BenchMax applicator, I attempted to thread the supplied labels through the machine.  You can download the directions here: https://greatengineering.com/pdf/BenchMAX_BenchMARK_Manual.pdf 

And be sure to watch this video on setting up the BenchMax first.  It’s important and helpful:

As the machine ships with the small container adapter in place, I made a mistake on the threading.  Therefore, I decided to remove the small container adapter before moving forward.

BenchMax Small Container Adaptor
BenchMax Small Container Adapter
But I had a heck of a hard time removing the adapter.  To remove the adapter, you need to remove the Hex screw shown below and the knob. 

Small Container Adapter Screw
When I tried to remove the screw, the adapter would turn, and not release.  I believe this problem says more about my mechanical skills than the adapter.  Once I held the adapter with the palm of my hand, and turned the Allen screw, the came off.  With the adapter off, it was easy to thread the labels through applicator.
After threading the labels, I had to set the gap sensor.  Frankly, I made a mistake in this step as well.  I could not get the provided labels to apply correctly. You need to make sure the sensor is positioned off a few mm from the leading edge of the first label.  This position below worked great.

BenchMax Label Leading Edge Exposed
BenchMax Label Leading Edge Exposed & Sensor Setting
And found the top of form on round labels as well:


Once I got the sensor set correctly, I was labeling containers. Even applying two labels to one bottle.


(Note to self: get some nice looking, unused round containers).
The BenchMax makes placing two labels with the correct spacing on one bottle easy to do.
After figuring out the applicator portion, I integrated my C7500G with the BenchMax.  Following the instructions for the Interface was easy; get the instructions here:  https://greatengineering.com/wp-content/uploads/2017/03/interfaceInstructions.pdf

And the included label guide instructions as well: https://greatengineering.com/wp-content/uploads/2017/04/GuideInstructions.pdf

I thought the label guide worked well; and may work better using fanfold labels:

BenchMax Label Guide
And in minutes, I was printing and applying labels to large containers.


And by reinserting the Small Container Adapter, I was printing and applying labels to smaller round containers:


And here you can watch the printer respond to the commands from the interface:


When you first start to integrate the printer/BenchMax, be sure to print 15 to 20 labels to have lots of slack in the system.  As the printer backs up when starting to print, you need approximately 10” to 12” of loose labels.  After printing this initial slack, the Interface does all the work.  And I confirmed, the Interface works with Adobe Acrobat and BarTender, making printing and applying labels with variable data easy to do.  Be sure to keep the software application open during application; so the Interface can continue managing the label printing.
If you own a C3500 or a C7500/C7500G and apply labels to a round container, you should consider purchasing a BenchMax label applicator.  Now, you can print and apply in one step; increasing productivity and insuring your labels are applied correctly in the exact position every time.  The BenchMax applicator with the Interface, Label Guide, Cables and freight costs approximately $10,000.
If you don’t own one of these printers, now you should consider purchasing both the printer and BenchMax applicator to improve your operations and look of your finished products.  Contact us to discuss how the BenchMax label applicator fits into your operation.
Guy Mikel
855-962-7670